
Planting a peach seed can be a thrilling experience, but it requires patience and the right techniques. You’re probably eager to start growing your own peach tree from scratch, and with the right guidance, you can enjoy a bountiful harvest in just a few years. But it all begins with selecting the right seed, and that’s where many people go wrong. Not all peach seeds are created equal, and some may be more viable than others, depending on their origin and quality. By the time you finish reading this guide, you’ll know how to select the perfect seed, prepare it for planting, and give it the best chance of success, ensuring a healthy and productive peach tree that will provide you with delicious fruit for years to come.
Choosing the Right Peach Seed
When it comes to planting a peach seed, selecting the right one is crucial for a successful harvest, and there are a few factors to consider.
Selecting the Best Seed Variety
When selecting a peach seed variety, you’ll want to choose one that’s well-suited to your region’s climate and growing conditions. There are several factors to consider, including the chill hours required, disease resistance, and yield potential. Some popular peach seed varieties include ‘Red Haven’, ‘Crimson Lady’, and ‘Bartlett’, each with its own unique characteristics.
Consider the chill hours required for your variety. Some peach trees, like ‘Red Haven’, require around 600 chill hours, while others, like ‘Crimson Lady’, can thrive with as few as 200. Make sure to choose a variety that matches your local climate’s chill hours. Disease resistance is also crucial, as peach trees are susceptible to fungal diseases like brown rot and scab.
In addition to chill hours and disease resistance, consider the yield potential of your variety. Some peach trees produce a single large crop, while others produce multiple smaller crops throughout the season. If you’re looking for a high-yielding variety, consider ‘Bartlett’, which produces an average of 20-30 pounds of fruit per year.
Storing and Handling Peach Seeds
When storing peach seeds, it’s essential to maintain a consistent temperature between 32°F and 40°F (0°C to 4°C). This range slows down the seed’s metabolic processes, preserving its viability. Avoid exposing seeds to direct sunlight, as this can cause them to dry out. Store them in an airtight container, such as a plastic bag or a glass jar with a tight-fitting lid, to prevent moisture loss.
Proper handling is equally crucial. Handle seeds gently to avoid damaging the embryo or pit. If you need to transport seeds, place them in a padded envelope or container to cushion them from shocks. When storing multiple seeds, label each container with the seed’s variety and date to ensure you use the oldest seeds first.
Some common mistakes to avoid include storing seeds in humid environments, such as basements or attics, and exposing them to extreme temperatures. Typically, peach seeds can be stored for up to six months, but it’s best to use them within three months for optimal results. By following these storage and handling tips, you’ll be able to maintain the viability of your peach seeds and ensure a successful planting process.
Acquiring Peach Seeds
You can acquire peach seeds from various sources, each with its own advantages and considerations. Online nurseries often carry a wide selection of peach seed varieties, including heirloom and hybrid options. You can browse their catalogs or websites to find seeds that suit your needs and climate. When purchasing from online nurseries, ensure they have a good reputation and offer healthy seeds.
Local nurseries and gardening stores may also carry peach seeds, and you can visit them in person to inquire about availability. This option allows you to inspect the seeds and get advice from knowledgeable staff. Some local nurseries may also offer a wider selection of varieties than online sources.
Another option is to obtain peach seeds from your own tree. If you already have a peach tree, you can collect seeds from its fruit. This ensures the seeds are adapted to your local climate and will produce trees with desirable characteristics. To collect seeds, choose fresh, ripe fruit and carefully extract the pit. Store the seeds in an airtight container and keep them in a cool, dry place until you’re ready to plant them.
Preparing the Seed for Planting
Before you plant your peach seed, you’ll need to prepare it for optimal growth. This involves cleaning and treating the seed to give it the best chance of germinating.
Removing the Pit
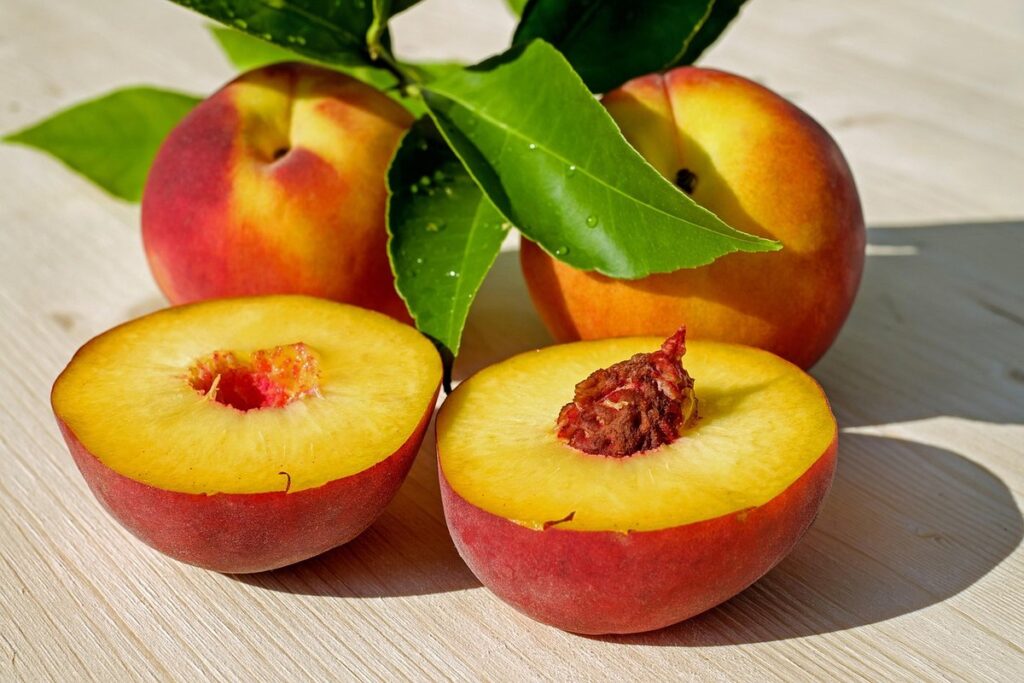
Removing the pit from the peach seed is a crucial step in planting a peach tree. The pit, also known as the stone, is hard and inedible, but it’s also the seed’s protective casing. If you don’t remove the pit, it can prevent the seed from germinating. To remove the pit, gently cut the peach in half and twist the two halves apart. You should see the pit visible in one of the halves. Use a spoon or a specialized seed-removal tool to carefully scoop out the pit, taking care not to damage the seed.
Once the pit is removed, you should see the flat seed with a small indentation on one side. This indentation is where the root will grow. Gently wash the seed under cool running water to remove any remaining pit fragments. Pat the seed dry with a paper towel to prevent fungal growth. At this stage, the seed is ready for scarification and soaking, the next step in preparing it for planting. Make sure to dry the seed thoroughly before proceeding with the next steps to prevent any potential mold or rot issues.
Scarification and Soaking
Scarification involves lightly scratching the seed coat to encourage water to penetrate and facilitate germination. This process is particularly important for peach seeds, which have a hard outer layer that can prevent water from reaching the embryo. You can use a nail file or sandpaper to gently scratch the seed coat, taking care not to damage the underlying tissue.
For soaking, you’ll want to submerge the seed in water for 24 hours. This helps to rehydrate the seed and encourages germination. You can use a glass or container filled with water, or even a zip-top bag to keep the seed moist. Be sure to change the water after 24 hours to prevent bacterial growth.
Some gardeners recommend using a soaking solution with a few drops of bleach or hydrogen peroxide to prevent fungal growth. However, this is not necessary for most peach seeds. Simply changing the water after 24 hours is sufficient. After soaking, remove the seed from the water and let it air dry for a few hours before planting. This will help prevent fungal diseases from taking hold.
Activating the Dormant Seed
When you extract a peach seed, you often find it’s covered in a hard, dry coating that prevents water from penetrating to the embryo inside. This protective layer can be a hindrance to germination. To activate the dormant seed, you’ll need to soften the coating through a process called scarification.
You can scarify a peach seed using a nail file or sandpaper. Gently rub the seed in one direction only, creating a small notch or scratch in the coating. This will allow water to seep in and stimulate the embryo to grow. Alternatively, you can soak the seed in water for 24 hours to help break down the coating. However, be careful not to soak the seed for too long, as this can cause it to rot.
It’s essential to scarify or soak only one or two seeds at a time, as this will allow you to monitor their progress and make adjustments as needed. By softening the seed’s protective coating, you’ll be giving the embryo the best chance to develop and ultimately grow into a healthy tree. To confirm that your seed is ready for planting, look for signs of swelling or a slight crack in the coating.
Planting the Peach Seed
Peach seed planting requires a specific approach to ensure germination and healthy growth, and we’ll guide you through this critical step of the process. Start by preparing a pot with a well-draining seed starting mix.
Selecting a Planting Location
When selecting a planting location for your peach tree, consider three key factors: sunlight, soil, and wind direction. Peach trees require full sun to produce a bountiful harvest, so choose a location that receives at least six hours of direct sunlight per day. South-facing walls or slopes are ideal, but be aware that intense afternoon sun can cause stress to the tree.
Soil quality is also crucial. Peach trees prefer well-draining soil with a pH between 6.0 and 7.0. Avoid areas with standing water or where water tends to collect, as this can lead to root rot. If your soil is heavy clay or sandy, mix in compost or well-rotted manure to improve its structure.
Wind direction is another important consideration. Peach trees can be sensitive to strong winds, which can cause damage to branches and reduce fruit production. If possible, plant your tree in a location that provides some protection from prevailing winds. Aim for a spot that receives gentle breezes or is partially shaded by a nearby building or hedge.
Preparing the Soil
Peach trees prefer a slightly acidic to neutral soil pH, ranging from 6.0 to 7.0. If your soil falls outside this range, it’s essential to adjust it before planting. A pH test kit can help you determine your soil’s acidity level. To lower the pH, add elemental sulfur or aluminum sulfate; to raise it, mix in lime. Maintain a consistent pH to promote healthy root growth and nutrient uptake.
The ideal soil mix for peach trees is well-draining, rich in organic matter, and contains essential nutrients. Add compost or well-rotted manure to improve soil structure and fertility. A balanced fertilizer, such as 10-10-10 NPK, can provide a foundation for nutrient needs. However, avoid over-fertilizing, as this can lead to weak root growth and reduced fruit production.
When preparing the soil, consider the peach tree’s deep root system. Avoid compacting the soil, as this can restrict root growth. Instead, gently loosen the soil to a depth of 12-18 inches. This will allow the roots to establish themselves and provide a stable base for the developing tree.
Planting the Seed
When planting the peach seed, it’s essential to consider the correct depth and spacing to ensure proper growth. You’ll want to plant the seed about ¼ inch deep in the soil, with the pointed end facing downwards. This will help the seedling develop a strong root system.
The seed should be planted in a location that receives full sun to partial shade, depending on your climate. If you’re planting in a container, make sure it has good drainage holes to prevent waterlogged soil.
When spacing peach seedlings, give them about 10-15 feet of space between each tree. This will allow for proper air circulation and prevent disease from spreading. You can also plant multiple seeds in the same area, about 6-8 inches apart, and then thin them out as they grow.
To minimize transplant shock, it’s best to plant the seed directly in the final location rather than starting in a nursery bed or container. This will also help you avoid over-handling the delicate seedling. By following these guidelines, you’ll be well on your way to planting a peach seed that will grow into a healthy, thriving tree.
Germination and Aftercare
Once you’ve planted your peach seed, it’s essential to provide the right conditions for germination to occur, which includes proper moisture and warmth. Next, we’ll discuss the aftercare steps to ensure a healthy and thriving seedling develops.
Creating a Suitable Environment
To create a suitable environment for the peach seed to germinate, you’ll want to provide optimal conditions for its growth. The ideal temperature range for peach seed germination is between 65°F and 75°F (18°C to 24°C). Avoid placing the seed near heating vents, radiators, or drafty windows, as this can cause inconsistent temperatures and hinder germination.
Maintaining the right humidity level is also crucial. The air should be moist but not waterlogged. You can cover the seed with a clear plastic bag or a cloche to create a mini-greenhouse effect, which will trap moisture and maintain humidity. Alternatively, you can place the seed on a tray filled with water and pebbles, ensuring the seed doesn’t come into contact with the water.
Aim for a humidity level of 70-80%. You can check the humidity by gently lifting the bag or cloche and observing the air inside. If it feels too dry, you can mist the air with a spray bottle. Most peach seeds will germinate within 1-3 weeks under these conditions. Keep the soil consistently moist but not waterlogged during this time.
Monitoring and Maintaining
Regular monitoring and maintenance are crucial for the newly planted peach seed to thrive. After planting, check the soil’s moisture daily, ensuring it’s consistently damp but not waterlogged. This is particularly important during the first few weeks when the seed is most vulnerable to drying out. A small, handheld watering can or a spray bottle is ideal for gentle, targeted watering.
Keep a close eye on the seed’s temperature, aiming for a consistent range of 65-75°F (18-24°C) during the germination period. Most peach varieties require around 30-60 days to sprout, but this can vary depending on the specific variety and growing conditions.
Maintain a clean and tidy growing environment by removing any dead or dying seedlings, and keep the area around the seed free from debris. This will prevent the spread of disease and encourage healthy growth. Avoid over-handling the seed, as this can cause physical damage and disrupt the delicate process of root development.
By staying vigilant and attentive to the seed’s needs, you can significantly increase its chances of successful germination and healthy growth. With regular monitoring and maintenance, you’ll be well on your way to cultivating a thriving peach tree.
Transplanting the Sapling
When the sapling has outgrown its initial container, it’s time to transplant it into a larger pot or directly into the ground. This process is crucial for the tree’s continued health and development. Typically, you’ll need to transplant the sapling when it reaches 6-8 inches in height and has 2-3 sets of leaves.
Before transplanting, choose a location with full sun and well-draining soil. If transplanting into the ground, ensure the area is free of any debris and has a pH level between 6.0 and 7.0. If you’re transplanting into a larger pot, select a container that is at least 12-14 inches deep to accommodate the tree’s root system.
When transplanting, gently remove the sapling from its container, taking care not to damage the roots. If the roots are wrapped in a burlap, remove the wrapping to prevent water from accumulating and causing root rot. Plant the sapling at the same depth it was previously, and water thoroughly to settle the soil. If transplanting into the ground, create a shallow trench and place the sapling in it, backfilling with soil and watering well.
Common Challenges and Troubleshooting
Even with careful planning, things can go awry when planting a peach seed, and it’s essential to know how to identify and fix common issues as they arise.
Identifying Common Issues
Poor germination rates can be a frustrating issue when planting a peach seed. This may be due to the seed being too old, or it may not have been properly prepared for planting. Check the seed for any visible signs of damage or mold, and discard it if you notice any issues. Make sure the seed has been properly soaked and scarified, as this can greatly improve the chances of successful germination.
Pests can also be a problem when planting a peach seed. Common pests include fungus gnats, mealybugs, and spider mites. Keep an eye out for these pests when you’re checking on the seedling, and take action immediately if you notice any signs of infestation. Use a gentle, targeted spray to control the pests, and make sure to follow the instructions carefully to avoid harming the seedling.
Some other common issues to watch out for include uneven watering, which can cause the seedling to become leggy or weakened, and inadequate light, which can slow down growth and development. Make sure to provide your peach seedling with plenty of bright, indirect light and maintain a consistent watering schedule to help it thrive.
Troubleshooting Strategies
When a peach seedling struggles to grow, it’s often a sign that the soil conditions aren’t suitable. Check the pH level and adjust it if necessary – most peach trees prefer a slightly acidic to neutral soil pH. If the soil is too dense or compacted, gently loosen it with a fork to improve drainage and aeration.
Pests like aphids, whiteflies, and spider mites can also hinder growth. Use neem oil or insecticidal soap to control infestations. For more severe issues, consider introducing beneficial insects like ladybugs or lacewings to prey on pests. Regularly inspect your seedling for signs of pests, such as sticky honeydew droplets or fine webbing.
Some issues may be related to the seedling’s environment. If the temperature is consistently below 65°F (18°C) or above 85°F (29°C), move the seedling to a spot with more moderate temperatures. Ensure it’s receiving sufficient light – peach seedlings need at least 4-6 hours of direct sunlight per day. Monitor the seedling’s watering schedule to prevent overwatering, which can lead to root rot and other problems.
Preventing Diseases
When planting a peach seed, disease prevention is crucial for a healthy and bountiful harvest. One of the most common diseases that affect peach trees is root rot, which can be caused by overwatering. To prevent this, it’s essential to water your tree properly. Water your peach tree when the top 2-3 inches of soil feel dry to the touch, and avoid getting water on the leaves to prevent fungal growth. Proper pruning techniques can also help prevent diseases. Remove any dead or diseased branches to prevent the spread of disease, and prune your tree annually to promote healthy growth.
Proper air circulation is also vital for preventing diseases. Peach trees that are too close together can create a humid environment that fosters disease growth. Make sure to plant your tree in a location with good air circulation, and avoid overcrowding the area with other plants. Regularly inspect your tree for signs of disease, such as yellowing leaves or black spots, and take action promptly to prevent the disease from spreading. By following these simple tips, you can help prevent diseases and ensure a healthy and productive peach tree.
Harvesting Your Peach Tree
Once your peach seedling is established, it’s time to start thinking about harvesting those delicious fruits. We’ll walk you through the process of picking and enjoying your homegrown peaches.
Understanding Peach Tree Growth Stages
As your peach tree grows, it will go through several distinct stages. The first stage is bud swell, where small, tight buds form on the branches. These buds will eventually open into leaves or flowers, depending on the tree’s age and development. During bud swell, the tree is preparing for either vegetative growth or reproductive growth, so it’s essential to monitor its progress.
Next comes the bloom stage, where the tree produces beautiful flowers. These flowers are crucial for pollination and will eventually develop into fruit. Make sure to keep an eye out for any signs of disease or pests during this stage, as they can quickly spread and damage the tree.
After the bloom stage, the tree enters the fruit set stage. This is when the flowers have been pollinated, and the fruit begins to develop. The fruit will grow and ripen over the next few months, and it’s essential to monitor its development to ensure a bountiful harvest. Keep in mind that peach trees typically take 2-3 years to mature and produce fruit after planting a seed.
Determining Harvest Time
When determining the optimal harvest time for your peach tree, there are two key factors to consider: color and texture. The first indicator of ripeness is the fruit’s color, which should be a deep yellow or orange, depending on the variety. However, don’t rely solely on color, as some peach varieties remain green even when ripe. Instead, check the skin for any soft spots or bruising, which can be a sign of over-ripeness.
Check the stem by gently tugging on it; it should come off easily if the peach is ripe. Also, inspect the texture of the flesh by cutting into a peach; it should be tender and slightly soft to the touch. Avoid over-ripened peaches, as they can be mealy and taste sour. Typically, peaches are ready to harvest 60 to 90 days after the tree’s bloom period. Keep in mind that weather conditions, such as heatwaves or frost, can affect the ripening process. If you’re new to growing peaches, it’s a good idea to taste a few to get a sense of the optimal ripeness for your tree.
Tips for Maximizing Yield
To maximize yield from your peach tree, pruning is a crucial technique. Prune your tree annually, removing about one-third of its growth. This promotes healthy growth, encourages fruiting branches, and prevents disease. Remove any dead, diseased, or damaged branches, as well as any crossing branches that may be rubbing against each other.
Fertilization is also essential for a bountiful harvest. Feed your peach tree with a balanced fertilizer in early spring, following the manufacturer’s instructions. You can also use a fruit tree-specific fertilizer, which typically contains additional nutrients like boron and zinc. Apply a second application of fertilizer in mid-summer, but be careful not to over-fertilize, as this can damage the tree.
In addition to pruning and fertilization, consider the following factors to optimize your tree’s yield: ensure adequate sunlight and air circulation, water your tree regularly but avoid overwatering, and provide support for the tree as it grows. With proper care and attention, your peach tree should produce a bountiful harvest for years to come.
Some key pruning techniques to keep in mind include:
- Removing water sprouts (shoots growing from the base of the tree)
- Thinning branches to allow sunlight to reach fruiting branches
- Training the tree to a central leader or open center system
Frequently Asked Questions
Can I plant a peach seed in a container?
Yes, you can plant a peach seed in a container, but make sure it’s at least 5-7 gallons to provide enough room for the seedling’s roots to grow. Use a well-draining potting mix and a container with good drainage holes to prevent waterlogged soil.
What if the seed doesn’t germinate after soaking and scarification?
If the seed doesn’t germinate after soaking and scarification, it may be due to poor seed quality or inadequate scarification. Try using a different seed or adjusting the scarification method. Also, ensure that the seed is planted at the correct depth and in a suitable environment with optimal temperature and humidity.
How long does it take for a peach seed to grow into a fruit-bearing tree?
The time it takes for a peach seed to grow into a fruit-bearing tree can vary depending on factors like climate, soil quality, and pruning practices. Generally, it can take anywhere from 2-5 years for a peach seedling to produce flowers and 5-7 years for it to produce fruit.
Can I plant multiple peach seeds at the same time?
Yes, you can plant multiple peach seeds at the same time, but make sure to space them at least 6-8 feet apart to prevent competition for resources. Also, be prepared for the possibility that not all seeds may germinate or grow at the same rate.
What if I notice pests or diseases on my peach tree after planting?
If you notice pests or diseases on your peach tree after planting, take immediate action to prevent the problem from spreading. Use organic pest control methods or fungicides as a last resort, and ensure that your tree is receiving adequate care, including regular watering, pruning, and fertilization.

