
When storing fresh-baked loaves, a sturdy and stylish bread bag is essential to keep them clean and fresh for hours. You’ve probably encountered flimsy or poorly designed bags that can’t withstand the weight of a heavy loaf, leading to crushed or torn fabric and wasted bread. A well-made bread bag sewing pattern is more than just a practical solution – it’s an investment in your baking routine. By creating a professional-grade bread bag from scratch, you’ll be able to store your loaves with confidence, knowing they’ll stay fresh and intact until mealtime. In this article, we’ll guide you through the process of designing and sewing your own durable and stylish bread bag pattern, covering expert tips on fabric selection, design, and assembly for a long-lasting storage solution that’s both functional and fashionable. By the end of this tutorial, you’ll be able to create a beautiful and practical bread bag that elevates your baking experience.
Choosing the Right Fabric
Choosing a suitable fabric for your bread bag is crucial, as it affects the durability and appearance of the finished product. Consider factors such as weight, texture, and breathability when making your selection.
Factors to Consider for Your Bread Bag Material
Selecting the right material for your bread bag is crucial because it will be exposed to various environmental conditions. Durability should be a top priority when choosing a fabric, as it will withstand daily use and repeated washing. A sturdy canvas or denim would work well, but cotton twill or sailcloth can also be good options.
Water resistance is another consideration, especially if you plan to carry bread in humid environments or wash the bag frequently. Look for fabrics with a water-repellent treatment or those that naturally shed water, such as nylon or polyester blends. However, keep in mind that excessive water resistance may compromise airflow and make the bag more prone to moisture buildup.
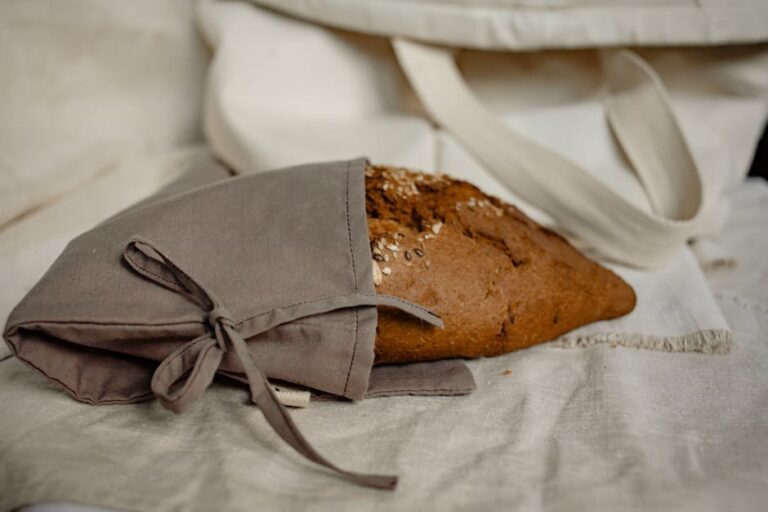
Aesthetics also play a significant role in material selection. You’ll want to choose a fabric that complements your bread bag’s design and personal style. Consider factors like color, texture, and pattern. For example, if you’re going for a classic look, cotton or linen might be the way to go. If you prefer something more modern, consider bold-colored fabrics with interesting textures.
Common Fabrics Used for Bread Bags
Cotton is a popular choice for bread bags due to its breathability and ease of care. However, it may not be suitable for heavy use as it can wear out quickly. A cotton blend or high-quality cotton fabric can help improve durability.
Linen is another option that offers good airflow and moisture-wicking properties. It’s ideal for warmer climates or for those who prefer a more rustic look. Linen can be prone to wrinkles, but this can be mitigated by pre-treating the fabric before sewing.
Canvas is a sturdy option that works well for bread bags with heavy loads. Its thickness provides excellent protection against spills and stains. However, canvas can be stiff, making it challenging to sew or shape. Some users find that applying a stabilizer or interfacing helps improve its pliability.
When selecting any of these fabrics, consider the intended use of your bread bag. For example, if you plan to carry large loaves frequently, canvas may be the best choice. If you prioritize breathability and a more natural look, cotton or linen might be a better fit.
Tips for Measuring and Cutting Fabric for a Perfect Fit
When cutting fabric for a bread bag pattern, it’s essential to ensure accurate measurements. Start by laying out the pattern pieces on the fabric, following the grain lines indicated on the pattern. Use a ruler or measuring tape to check that all edges are parallel and at a 45-degree angle. A slight error in alignment can result in a skewed shape.
Use a rotary cutter or scissors to carefully cut along the drawn lines, leaving a 1/4 inch seam allowance around each piece. When cutting curved shapes, use a template or pattern weight to help maintain smooth curves.
For optimal fit, it’s crucial to account for the bread bag’s filling and any decorative elements. Add about 2-3 inches to the main compartment dimensions to allow for comfortable stuffing and even distribution of pressure on the seams. This will also give you some flexibility when sewing the sides together. Make sure to label each cut piece with its corresponding pattern piece number or letter, so it’s easy to match them up during assembly.
Designing Your Custom Pattern
Now that you’ve chosen a bread bag style, it’s time to think about the details – let’s break down how to create your custom pattern from scratch. This process involves measuring and sketching out every aspect of your design.
Understanding Bread Bag Shape and Size Requirements
When designing your bread bag pattern, it’s essential to consider the key dimensions that will determine how your finished product looks and functions. Start by thinking about the width of your bag. A standard loaf of bread is typically around 8-10 inches wide, but you may want to consider a slightly wider or narrower design depending on your personal preference.
The height of your bag is also crucial, as you’ll need to ensure it’s tall enough to accommodate a full-sized loaf without the top getting crushed. Aim for a minimum height of about 12 inches, but feel free to experiment with taller designs if you prefer.
Finally, consider the depth of your bag. This will depend on how much storage space you want to include, as well as whether you’re planning to add any internal compartments or pockets. A good starting point is around 6-8 inches in depth, but adjust this based on your specific needs and design goals.
Adding Straps or Handles for Easy Transport
When designing your custom bread bag pattern, you’ll want to consider how you’ll transport it from one place to another. Adding functional straps or handles can make a big difference in convenience and usability. You can use webbing, canvas, or even recycled material for the strap, attaching it to the top of the bag with sturdy stitching.
For handles, look for a sturdy material that won’t stretch over time – cotton tape or ribbon work well. Attach them about 2-3 inches apart at the top of the bag, securing them firmly in place. Make sure they’re long enough to carry the bag comfortably, but not so long that they get in the way.
When choosing strap and handle placement, think about how you’ll be using your bread bag. If it’s for daily use, you may want straps that are easy to slide on and off. For longer trips, consider a more secure attachment method to prevent the bag from slipping out of your hands. Experiment with different placements and materials until you find what works best for you.
Incorporating Additional Features Like Pockets and Compartments
When designing your custom bread bag pattern, you may want to consider adding additional features like pockets and compartments to enhance its functionality. This can be achieved by incorporating extra shapes and lines into your design.
Start by identifying the type of pocket or compartment you need. A small zippered pocket is perfect for storing utensils, while a larger pouch is ideal for carrying bread rolls. Consider the size and position of each feature, ensuring they don’t compromise the overall aesthetic of the bag.
A good rule of thumb is to place pockets near the top of the bag, where they’re easily accessible. Compartments can be strategically positioned on either side or at the bottom of the bag, depending on your specific needs.
Remember that larger features require more fabric, so factor this into your overall material calculation. You may need to adjust your seam allowance and grain lines accordingly. By incorporating thoughtful pockets and compartments, you’ll create a bread bag that’s both practical and beautiful. This attention to detail will make all the difference in the finished product.
Creating a Professional-Grade Pattern Draft
Now that you have a basic pattern shape, let’s refine it into a high-quality draft by adding key features and details to make your bread bag sewing pattern truly professional.
Basic Understanding of Sewing Pattern Making
When working on a sewing pattern for a bread bag, it’s essential to understand the fundamental concepts and terminology associated with sewing pattern making. At its core, a sewing pattern is a blueprint for creating a garment or accessory, including specific markings that guide the cutting and construction process.
Grain lines are essential to consider when creating a sewing pattern. They indicate the direction of the fabric’s weave, which affects how it will behave during cutting and sewing. Notches on a pattern piece serve as visual indicators of seam alignment, ensuring accurate placement of pieces during assembly. Seam allowances, typically 1/4 inch or 5 mm, allow for a small margin between seams to prevent fraying.
To create an effective grain line, it’s crucial to identify the fabric’s warp and weft directions and align them with the pattern piece accordingly. This will help prevent distortions and ensure a smooth, even finish on your bread bag. When working with notches, use them consistently throughout your pattern pieces to avoid confusion during construction.
Measuring and Marking Your Pattern Pieces
To ensure accuracy, it’s crucial to measure and mark your bread bag pattern pieces correctly. Start by laying out each piece on a flat surface, smoothing out any wrinkles or creases. Use a ruler or measuring tape to double-check the measurements against your original pattern design. Verify that all markings, such as grain lines and seam allowances, are clearly visible.
For marking purposes, use a fine-tip marker or tracing wheel, depending on your preference. A tracing wheel is ideal for large areas, while a marker is better suited for intricate details. Make sure to label each piece with its corresponding name or number, and include any relevant notes about grain direction or notches. It’s also essential to mark the top and bottom of each piece clearly, as this will help during assembly.
When measuring and marking, it’s common to use a combination of straightedge and curve rulers. For example, you might use a straightedge to draw a horizontal line for the bag’s top edge, while employing a curved ruler for the rounded sides. By taking your time and being meticulous with measurements and markings, you’ll be well on your way to creating accurate bread bag pattern pieces.
Troubleshooting Common Pattern Issues
When working with a bread bag pattern, it’s not uncommon for issues to arise during the drafting process. One common problem is a wonky or asymmetrical design, often caused by inconsistent seam allowances or misaligned grain lines. To address this, double-check your pattern pieces and ensure that all seams are set at 1/2 inch. Also, verify that your fabric’s grain line matches the direction indicated on the pattern.
Another issue you may encounter is a bag that doesn’t fit comfortably around the bread. This could be due to an inaccurate calculation of the bag’s gusset width or insufficient ease in the side seams. To troubleshoot this, re-check your math and consider adding more ease to the design. If you’re using a commercial pattern, consult the manufacturer’s guidelines for adjusting the size.
In some cases, bread bags may not have enough structure to support the weight of the loaf. This can be resolved by introducing additional stabilizing elements, such as interfacing or fusible web, into the design. When choosing these materials, consider factors like fabric type and weight to ensure they provide sufficient stability without compromising the bag’s flexibility.
Cutting Out Fabric According to Your Custom Pattern
To cut out fabric according to your custom pattern, you’ll need to carefully lay out and cut each piece accurately to ensure a perfect fit for your bread bag. Make sure to use scissors or a rotary cutter specifically designed for fabric cutting.
Tips for Efficient Fabric Cutting
When cutting out fabric for your bread bag pattern, it’s essential to minimize waste and optimize cutting speed. To achieve this, use a rotary cutter with a 45-degree blade angle to make smooth, precise cuts through the fabric. Hold the ruler firmly against the fabric as you cut to ensure straight lines.
Cut multiple layers of fabric at once by placing them under the presser foot of your sewing machine in one operation. This technique is known as “grouping” and can save time and reduce waste. However, be cautious not to apply too much pressure, which may distort the fabric.
When cutting curved or irregular shapes, use a template or pattern piece to help guide your rotary cutter. Make small, gentle cuts through the fabric, gradually following the curve of the shape. For smaller patterns like the bread bag’s corners, cut them using scissors for greater control and accuracy.
Using Rotary Cutters, Mat, and Rulers for Precise Cuts
When working with fabric for your bread bag pattern, precision is key to avoid mistakes and wasted material. A rotary cutter set is an essential tool for making accurate cuts, especially when it comes to irregular shapes like bread bags require. The benefit of using a rotary cutter over scissors lies in its ability to make smooth, straight cuts without fraying the fabric.
To get the most out of your rotary cutter, use it in conjunction with a cutting mat. This provides a stable surface for cutting and prevents the tool from slipping or damaging the surrounding material. Keep your ruler handy as well, using it to guide the cutter along the desired edge of your pattern piece. Place the ruler on top of the mat, aligning it with the marked lines on your fabric, then carefully move the rotary cutter along the ruler’s edge.
Most rotary cutters come with a guard that prevents accidental cuts; make sure to engage this feature when cutting curves or corners.
Strategies for Managing Multiple Pattern Pieces
When working with multiple pattern pieces for your bread bag, it’s essential to establish a clear organization system. This will save you time and frustration during the cutting process. Start by laying out all your fabric, patterns, and necessary tools on a large, flat surface. Sort your patterns into categories based on their size, type, or function. For example, separate the main bread bag piece from the pocket and handle pieces.
Use a pattern label maker to clearly identify each piece, making it easier to keep track of them. You can also color-code your labels for an added visual aid. Consider using a large cutting mat or board with grid markings to help you accurately cut out each piece. This will prevent mistakes and ensure that all pieces are the correct size.
Finally, prioritize cutting out the largest pieces first, such as the main bread bag body, before moving on to smaller components like pockets and straps. This order of operations will minimize waste and make it easier to assemble your finished bread bag.
Assembling Your Bread Bag with Precision
Now that you’ve cut out your bag pieces, it’s time to carefully assemble them into a sturdy and functional bread bag. Let’s learn how to join these parts together with precision.
Threading Your Machine and Preparing to Sew
When threading your sewing machine, begin by locating the spool pin and tension discs on the front of the machine. Insert the thread into the spool pin, leaving a small amount of slack to allow for easy threading through the take-up lever. Gently pull the thread until it’s seated in the tension discs.
Next, pass the thread under the presser foot and then over the hook. The thread should now be on the machine’s right side, with the end closest to your body. Guide the thread through the take-up lever, making sure it’s not twisted or bunched up. Pull the thread gently but firmly until you feel resistance.
Now that your machine is threaded, check the tension by sewing a few reverse stitches. This will ensure the thread is properly seated and the tension is even. If necessary, adjust the upper and lower tension discs accordingly.
Finally, set your stitch length to 2-3 mm for most bread bag patterns. You can also refer to your pattern’s specific requirements or the machine’s manual for guidance on optimal settings. With your machine prepared, you’re now ready to begin assembling your bread bag with precision and accuracy.
Stitch Selection and Tension Adjustment
For a professional finish, it’s essential to choose the right stitch type and adjust the tension accordingly. A straight stitch is suitable for most bread bag seams, as it provides strength without bulk. However, for curves or areas prone to stress, such as the bottom seam where the bag meets the strap, a zigzag stitch can offer extra durability.
Tension adjustment is also critical. If the thread is too tight, it may pucker the fabric; if it’s too loose, the stitches may appear uneven. Start by threading your machine with a 50/60-inch length of thread and adjust the tension dials according to the manufacturer’s guidelines. Test the stitch on scrap fabric to ensure it lies flat without puckering.
In general, cotton or linen fabrics require slightly looser tension settings than polyester or knits. You can also use a walking foot or even feed foot to help guide the fabric and maintain consistent tension. This will be particularly useful for heavier or thicker materials that may struggle with standard stitch formation.
Techniques for Reinforcing Stress Points and Seams
When reinforcing stress points and seams, it’s essential to use techniques that ensure durability and prevent wear. One common method is topstitching, where you sew a line of straight stitches over the seam allowance, about 1/8 inch from the edge. This adds visual appeal while providing extra reinforcement.
Another technique is using zigzag stitching or stretch stitch on your sewing machine. These specialized stitches are designed to move with the fabric as it’s filled with bread, reducing stress on the seams. For example, if you’re sewing a seam that will be subject to heavy use, such as where the bag’s handles attach, consider using a heavier-duty zigzag stitch.
When choosing a reinforcement method, consider the type of fabric and intended use of your bread bag. Heavyweight canvas or denim may require more robust stitching than lighter-weight cotton or linen. It’s also important to press seams before topstitching or applying additional reinforcement, as this helps ensure smooth, even stitches and prevents puckering. By incorporating these techniques into your sewing process, you can create a bread bag that withstands daily use and maintains its shape over time.
Adding Final Touches and Embellishments
Now that you’ve sewn your bread bag together, it’s time to add some finishing touches to give it a professional look. This includes any final stitching, decorative elements, and details to make your bag truly special.
Decorative Stitches and Appliqué Options
When it comes to adding decorative stitches and appliqué to your bread bag, you have a wide range of techniques to explore. One option is to use contrasting thread colors to create intricate designs, such as chevrons or zigzags, along the bag’s edges or on the main body.
For more subtle effects, consider using satin stitch, stem stitch, or herringbone stitch to create textured patterns and add visual interest without overwhelming the design. If you’re feeling adventurous, experiment with free-motion stitching or embroidery floss to create custom designs and embellishments.
Appliqué is another popular technique for adding decorative elements to your bread bag. You can use pre-made appliqué shapes or cut out intricate designs from fabric scraps to create personalized motifs. Consider using fusible web to attach the appliqué pieces, making it easy to remove them if needed.
When choosing between decorative stitches and appliqué, keep in mind that both methods require minimal additional time and materials, yet significantly enhance your bread bag’s visual appeal.
Personalizing Your Bread Bag with Names, Logos, or Custom Designs
To add a personal touch to your bread bag, you can personalize it with names, logos, or custom designs. For durability and functionality, consider using heat transfer vinyl (HTV) for names or logos. This method is suitable for cotton fabrics and works well with most sewing patterns.
When applying HTV, use a cutting mat and weeding tool to avoid excess residue and ensure precise cuts. Place the design on the bag’s exterior, aligning it with the center of the fabric. Cover with parchment paper and apply heat with a household iron or a heat press according to the manufacturer’s instructions.
Alternatively, you can embroider names or logos directly onto the bread bag using a sewing machine. This method is more time-consuming but provides a long-lasting result. For embroidered designs, choose lightweight embroidery floss and a matching thread color to avoid excess bulk. Consider pre-threading your sewing machine for efficient stitching and minimal interruptions during use.
Frequently Asked Questions
How Long Does It Take to Sew a Bread Bag from Scratch?
It can take anywhere from several hours to a full day or weekend, depending on the complexity of your design and your level of sewing experience. To minimize time spent on each project, it’s best to prepare all materials and tools in advance.
What If I Don’t Have Any Sewing Experience – Can I Still Make a Bread Bag?
Yes, you can still make a bread bag with minimal sewing experience. Start by using pre-made patterns or tutorials designed for beginners, and gradually move on to more complex projects as your skills improve.
How Do I Ensure My Bread Bag Stays Water-Resistant Over Time?
To maintain water resistance, use a waterproof lining or treatment on the interior of your bread bag. Regularly clean and dry the fabric to prevent dirt and grime from compromising its water-repellent properties.
Can I Use Recycled Materials to Make a Sustainable Bread Bag?
Yes, you can repurpose old fabrics like cotton sheets, denim jeans, or even plastic bags to create an eco-friendly bread bag. Simply choose materials that are durable, stain-resistant, and suitable for the intended use case.
Is It Possible to Add Insulation to My Bread Bag for Better Temperature Control?
Yes, you can add insulation to your bread bag using materials like foam inserts, thermal batting, or even recycled newspaper. This will help maintain a consistent temperature inside the bag, keeping bread fresh for longer periods.

